
To see the background / context to this post, check out part 1.
The tl;dr is that I’m trying to re-purpose older parts to house my many various hard drives, and create a somewhat affordable and flexible NAS.
Now, why don’t I just drop a few thousand on a Synology system and some new drives? Because that would take me in the order of around ~$5k. I also am allergic to the idea of turfing out perfectly functional hardware. Energy costs aside – I still need something powerful enough to cope with multiple Plex streams, and large amounts of storage. Again, I can replace multiple drive with single drives – but that costs a lot of money too. Now, back to the story…
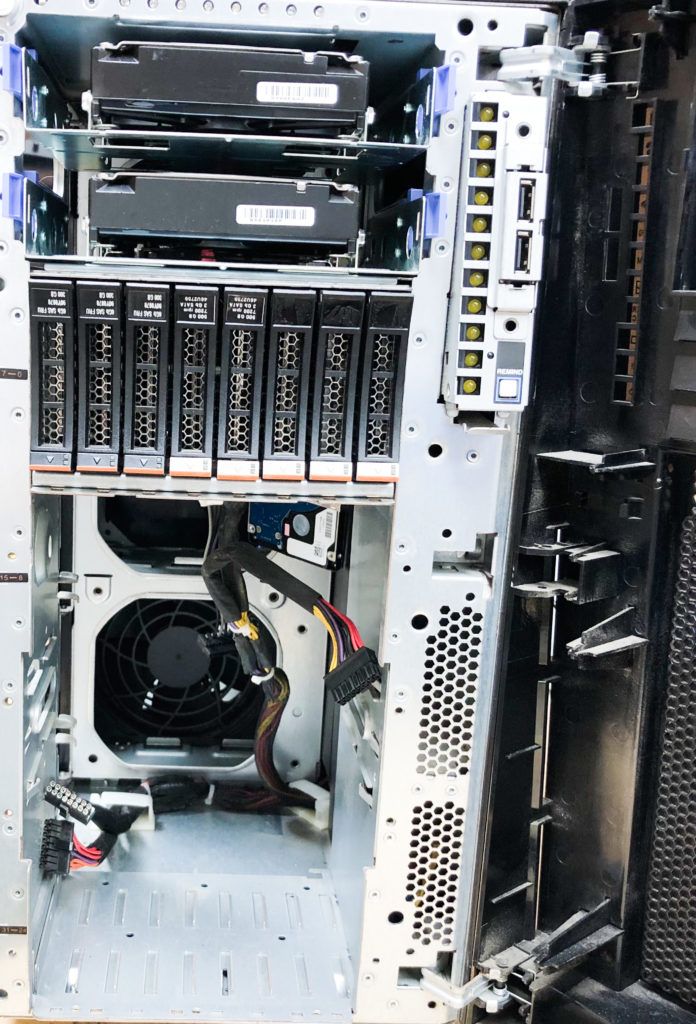
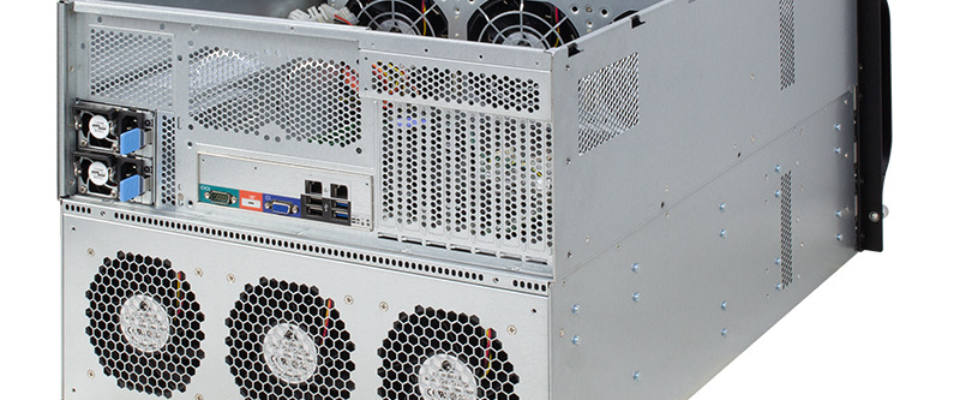
This is the server in question.
It has a sizeable drive-bay-sized hole under the 8-bay 2.5″ drive cage. Our goal is to find a way to mount some 3.5″ drives in there. As explained previously, finding second-hand / used parts was proving difficult – and when able to be found, were very expensive – I was looking for compatible drive cages that would make this whole thing a deal easier, at least in terms of mounting and connecting (the server has capacity for backplanes, and custom connectors read-to-go).
So, as with all wild endeavours, the start of the journey began with Ebay. There wasn’t a whole lot there, except for some generic drive cages – which would work, and aren’t too expensive (~$25), but there was no way to properly attach and mount it to the server case. The server isn’t exactly mobile – but you want to make sure things don’t fall out when you try and do maintenance on the machine itself.
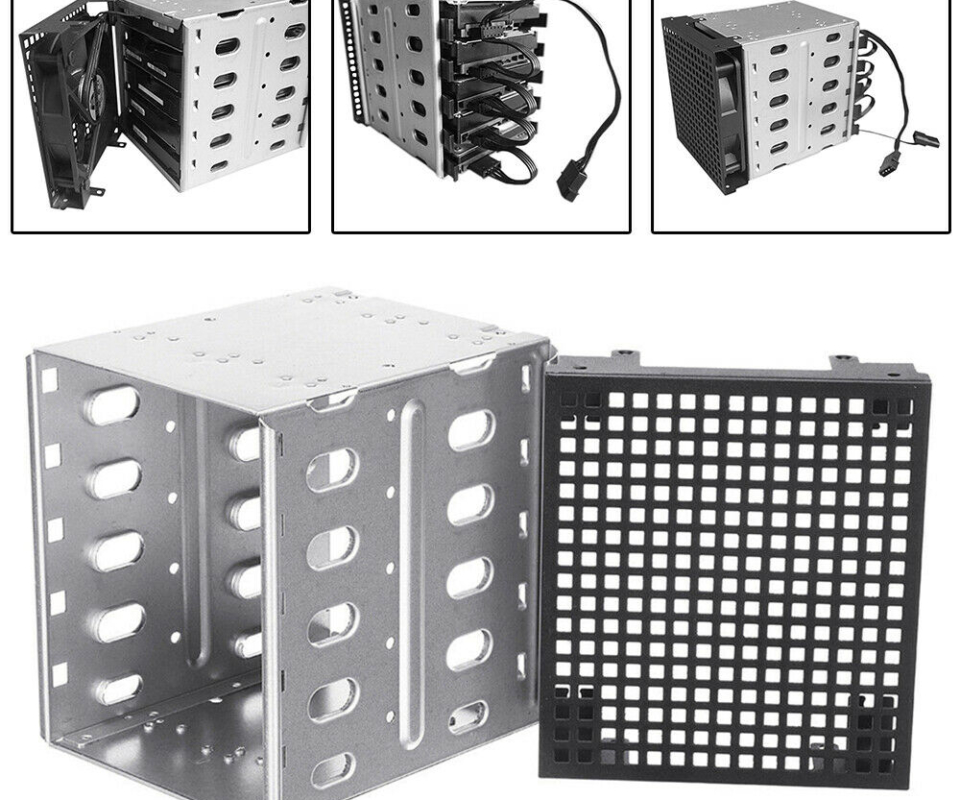
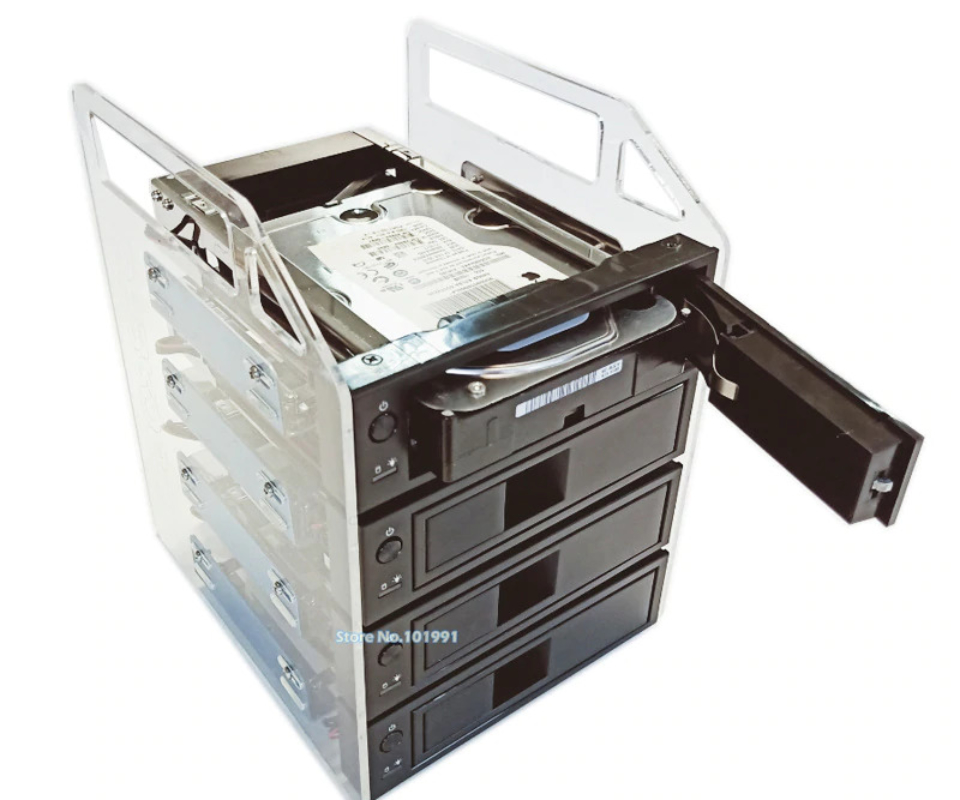
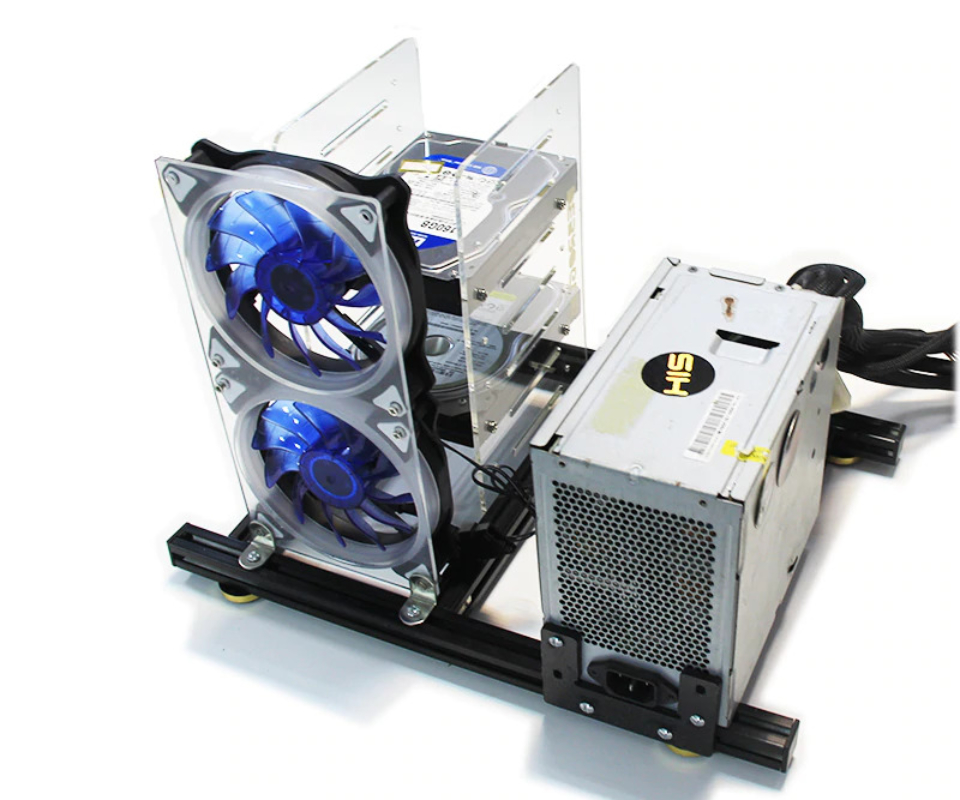
After exhausting Ebay – which really didn’t have much of anything; most of the mounts lacked any connectivity backplane (which is kind of a ‘nice to have’, especially with this heavy server) – I started browsing Ali Express. This one yielded a couple more interesting options – mostly self-standing HDD racks (kind of obscure, especially with their own power supplies – but actually not a terrible idea). Again, these lacked connectivity and had the issue of no easy mounting. See, the width of these cases is bigger than your 3.5″ drive (see at the top of the photo where the drives are in 5.25″ mounts + Rails).
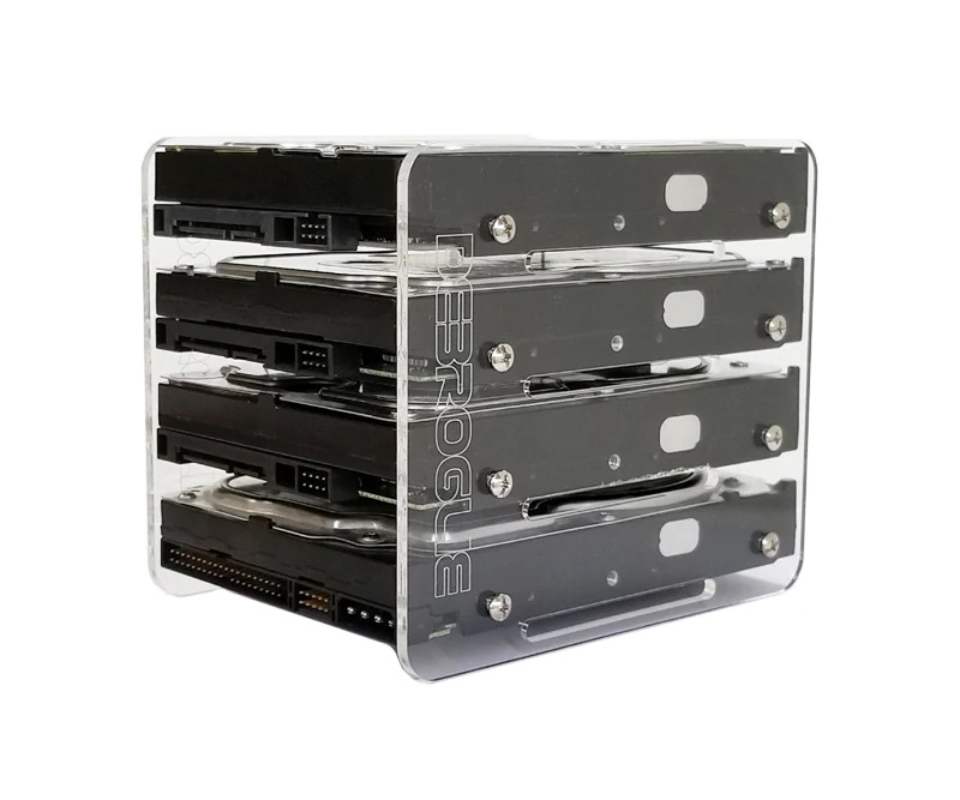
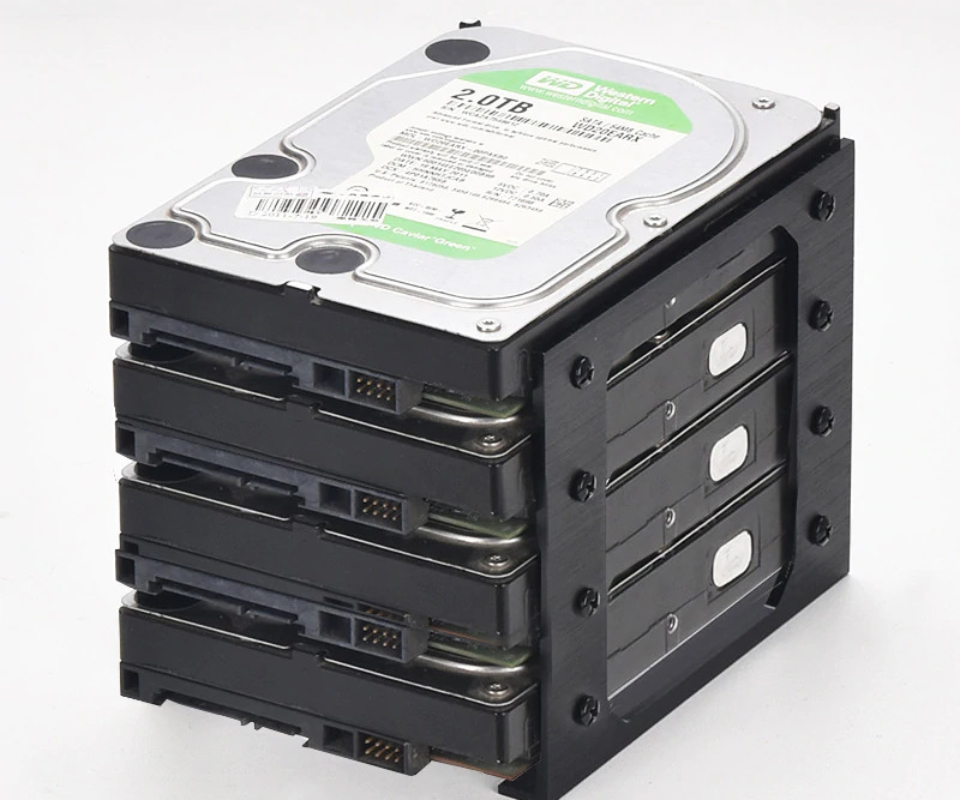
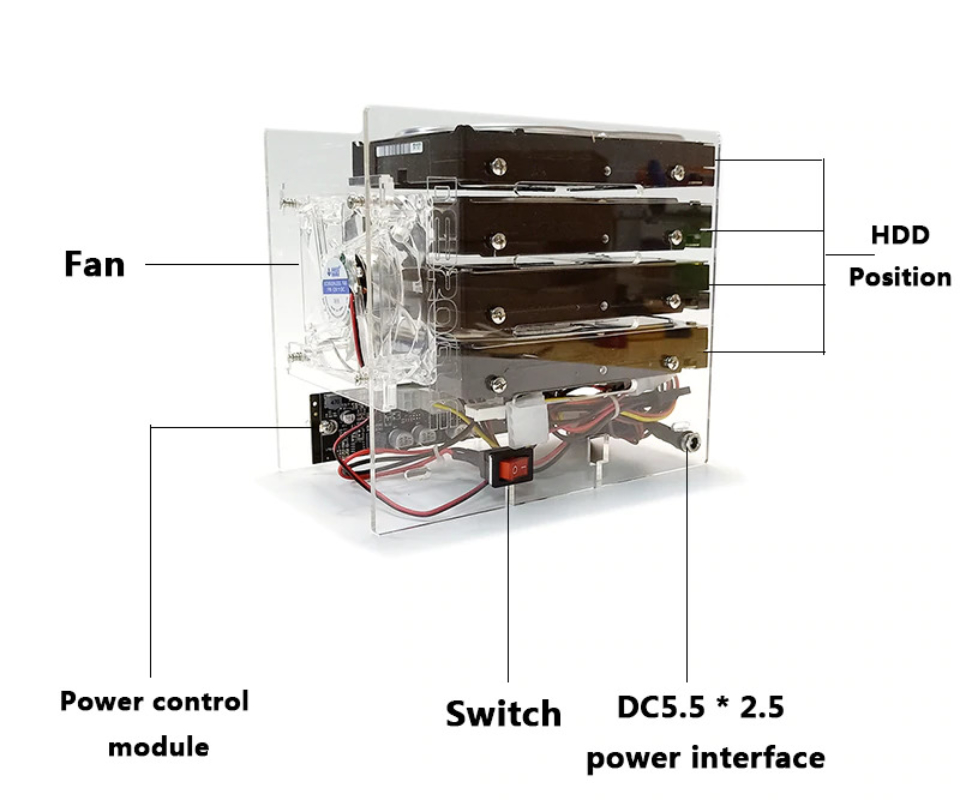
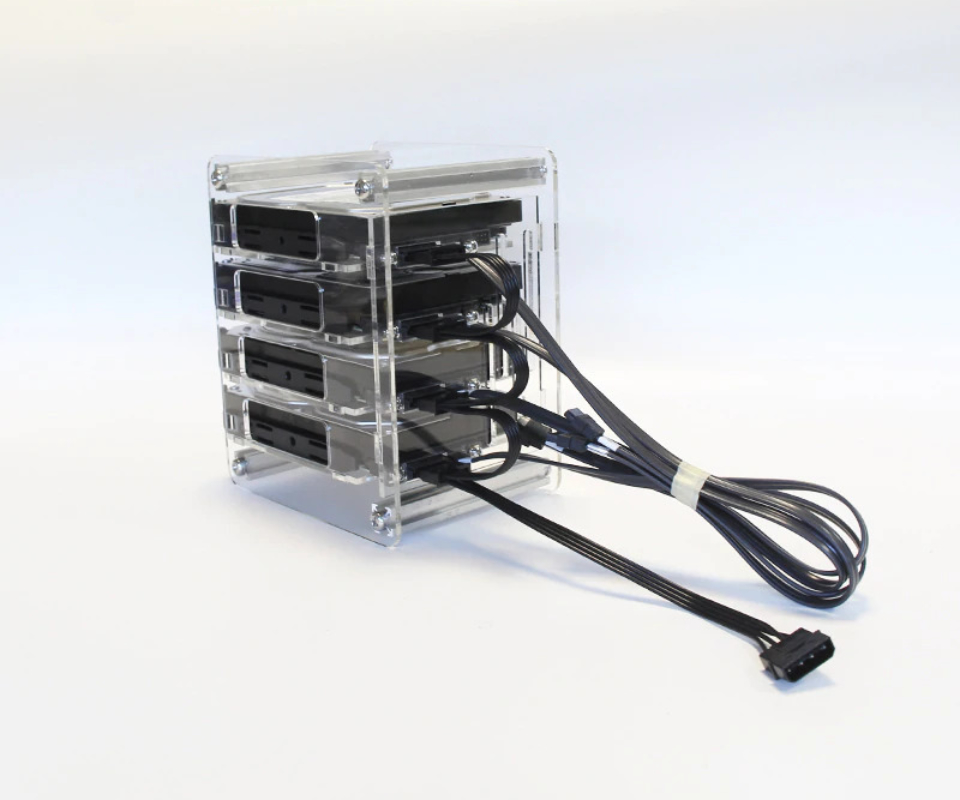
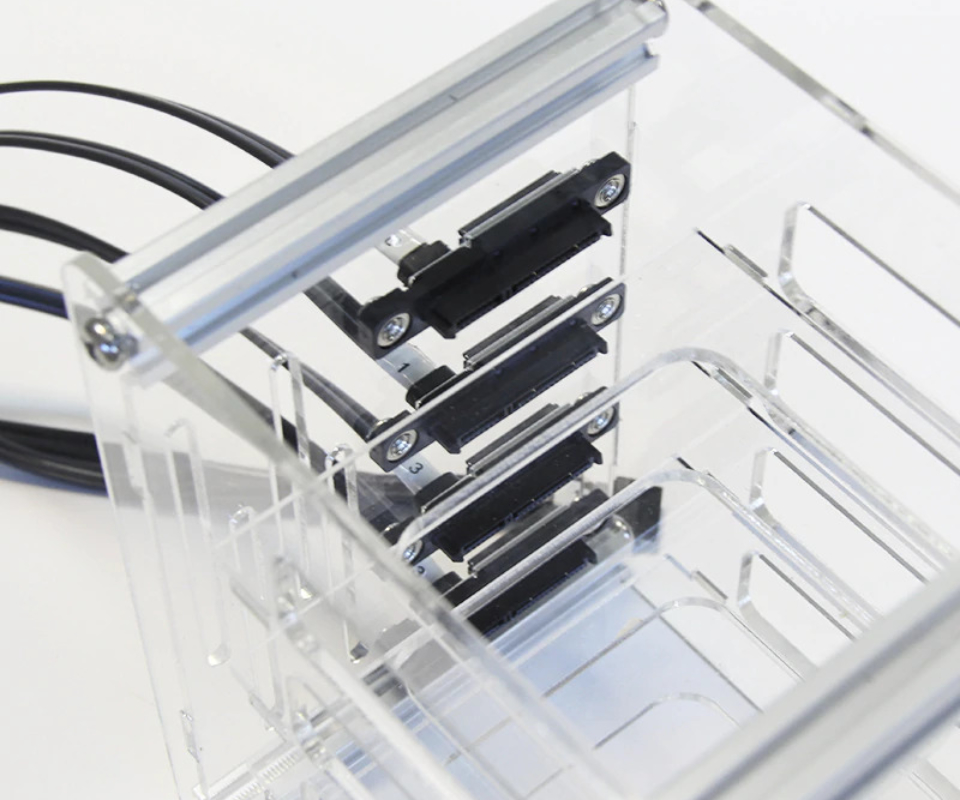
So, the acrylic box with single backplanes intrigued me. Try as I might, I could not locate the single backplane sockets anywhere; perhaps if I was in Shenzhen someone could direct me to where I could buy them. I decided to switch tracks slight – and go to Ali Baba. I had an account from years ago when I was toying with the idea of trying to create some custom cases to house an eeePC moded with a touchscreen (early tablet, hey!) but it never went anywhere for a host of reasons. Figured I could use this account if I found anything on Ali Baba. Now, the one thing with Ali Baba vs Aliexpress is that most places sell in large quantities – like, in the thousands. Oh, sure – you can get ‘sample copies’ of 1 – but even those can be costly sometimes. It does seem that many sellers now offer smaller quantity purchases which is good to know. Most of the stuff was still outlandishly expensive (they deal in $US and then have really expensive shipping rates – at least those listed to the USA; nothing for Australia).
By this point, I was looking to see if I can maybe just get a different case; transplanting drives over; or maybe something which I could extract the cage from and re-purpose (with the backplane and all).
I had also started to contemplate 3D printing / building from plywood my own custom enclosure to fit the space; I found this neat project on thingiverse. It doesn’t exactly suit my need, but figured I could adapt some part of the project. I also decided to look into BackBlaze – as they have open sourced their designs. To this end, I started looking into backplanes themselves, and designing custom enclosures to suit these. I had a couple from my servers that I reverse-engineered the power for (including the one that had killed a 2 TB drive – I found some writing online on the correct power for each pin, and have since tested it working okay); but I wanted to see if I could find one that was bigger, or more uniform. The two I had were both different – so it would still be a bit of an odd-job.

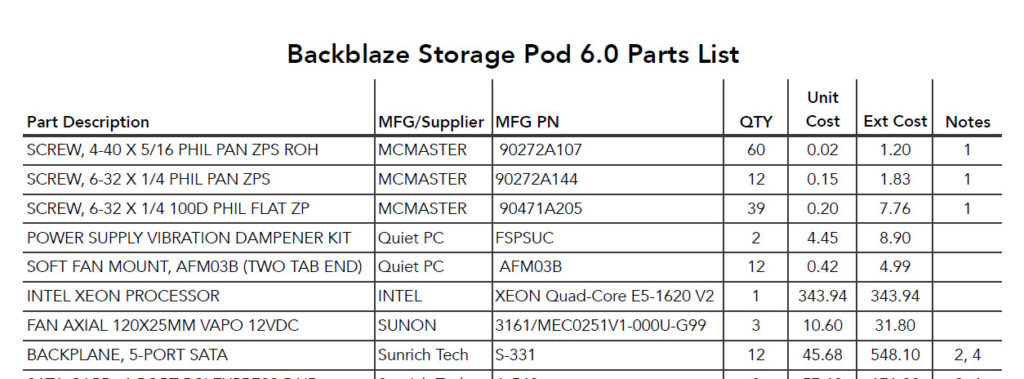
The BackBlaze Storage Pods use 5-Port SATA backplanes from Sunrich. I couldn’t find any suppliers of these in Australia – but after doing some reading, I discovered these wouldn’t be any good anyway. These take a single SATA cable and split it to 5x drives. This is great if speed isn’t needed (such as the BackBlaze use case); but I actually wanted to still have some good read/write latency.
Looking around on Alibaba, there were a few other options – but still very expensive, and wanting purchases in the thousands. And I really wasn’t looking to sell my creation commercially – nor had any commercial use for it.
In continuing my random ebay browsing, I stumbled upon this little unit:
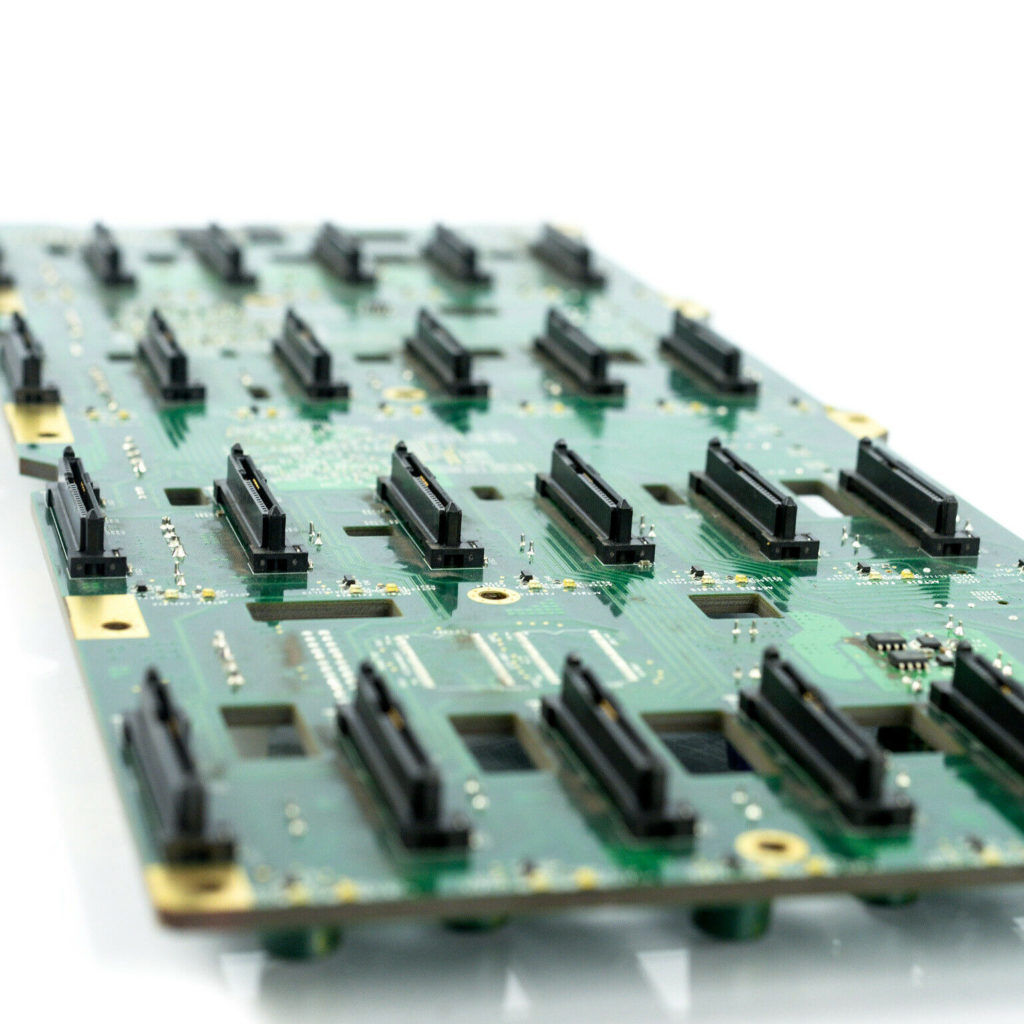
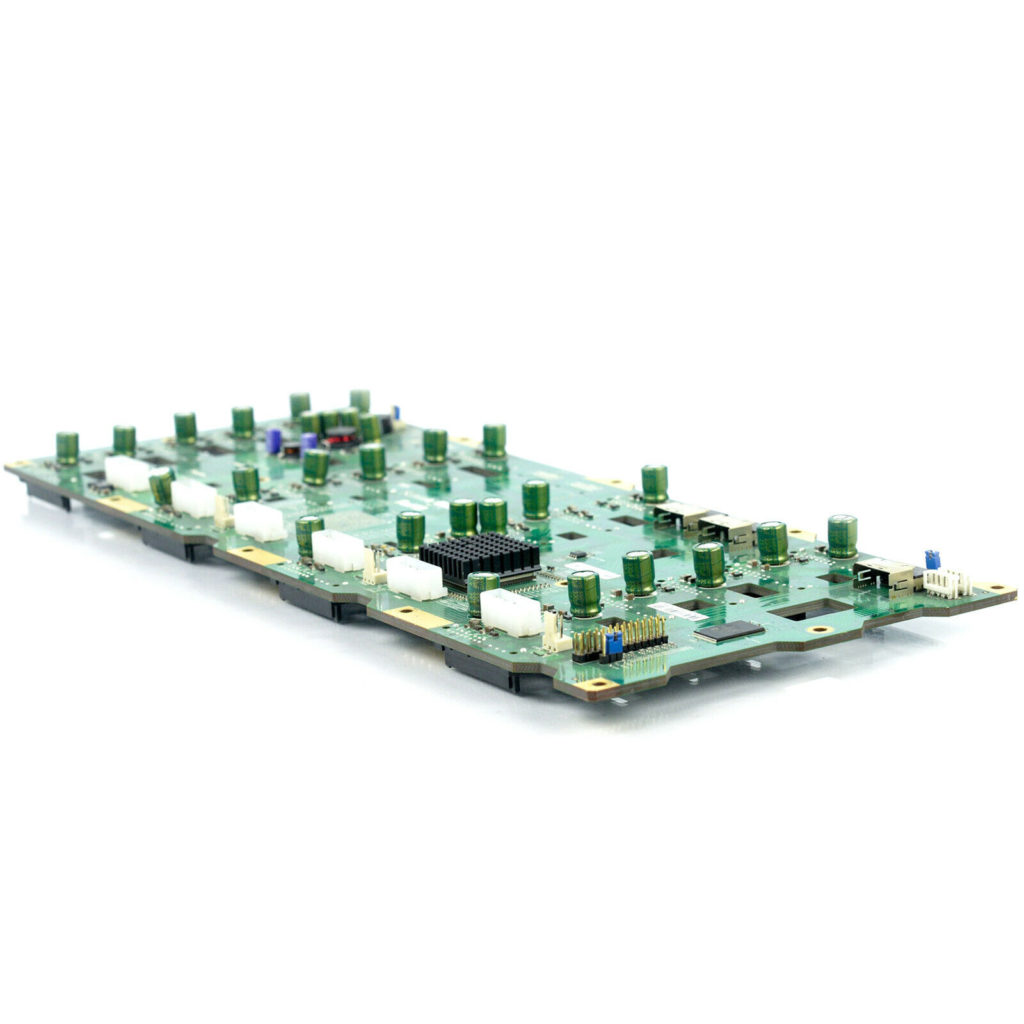

This is the Supermicro 4U 24 Bay SAS/SATA Backplane SAS846EL1. It comes from one of their server chassis that they create / sell. Initially, I was quite excited by the prospect of this. I could create my own Pod-style storage unit, and in reading further – found out it has a port multiplier – so I wouldn’t need to connected every one of the mini-SAS connectors on the board. The other really nice feature is the use of 4-pin Molex connectors, not specialised power couplings, make it much more compatible. Sourcing it was still an issue. I found an American seller – whose selling price was ‘okay’ – but shipping amounted to ~$75 Australian. They had a couple of other Supermicro backplanes which I thought could work as well; but they seemed unwilling to budge on the shipping cost (well, they just flat out refused to answer my question about combined shipping the three times I asked, so I have given up.
I also found this on some other random website; best I could tell it was based in Vietnam (whois lookup pointed to a Vietnamese Web development company). They never responded to my enquires, and they had a real mix of stuff on their site – with what looked like copy-pasta from ebay (Seriously, the page for the product included unformatted text saying “description” and “item specifics”.
I almost pulled the trigger on this from the American seller, until I randomly stumbled upon this site, where I finally read that this was SAS-1, 3GBPS. Not ideal; and I wasn’t willing to spend that much on such old technology. Apparently there’s a v2 of this board that does SAS2; but word has it that these are still harder to come by and expensive; the v1 is readily available because everyone is decommissioning these servers, and they’re being pulled for parts.
So now, I’m back to the drawing board to try and find a backplane, or find a way to manufacture one myself. The Backplane isn’t critical, but if I’m looking to create my own custom, but smaller, Pod-type system, I think something like it is crucial to how it operates. The other issue, as was mentioned in an interview with the Pod Father is:
The issue with power was not that we were running out of power on the 12V rail. The 5V rail was the issue. All the high end, high-power PSUs give you more and more power on 12V because that’s what the gamers need — it’s what their CPUs and the graphics card need, so you can get a 1000W or a 1500W power supply and it gives you a ton of power on 12V, but still only 25 amps on 5V. As a result, it’s really hard to get more power on the 5V rail, and a hard drive takes 12V and 5V: 12V to spin the motor and 5V to power the circuit board. We were running out of the 5V.
Tim Nufire
So I’ve been exploring a few ideas. One that came to mind was to use a higher-powered PSU, and get one of the two 12v rails, and put some 5volt DC-DC convertors on them. However, these tend to cap out at 5amps each. Which could be fine for a few drives – but how many of this things did I really want to have? In discussing things with my dad – an electrician and electronics guru by hobby – we decided that the best course of action would likely be to build my own power supply. If I do go down that route, I’ll keep it documented and provide plans for others to copy + improve upon.